February 10, 2025
Additional information
Flattening the plane sole with aluminum oxide finishing film
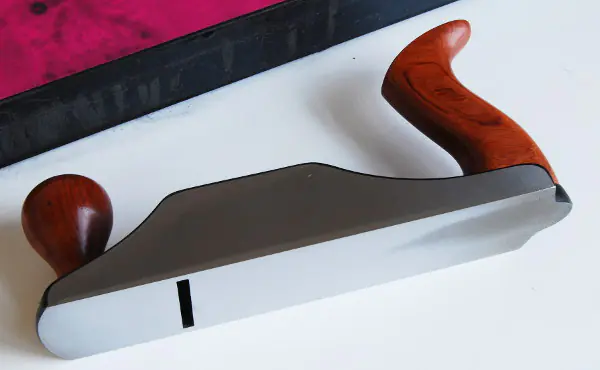
A Juuma smoothing plane No. 4 had a slightly hollow sole and bumped against a metal part with the front left corner (image) while planing. The dent at the front caused a small bulge at the sole edge. This was an opportunity to use our new Alox Finishing Film when flattening the sole.

- Left - Hold the knife and move the sharpening stone
- Right - Hold the sharpening stone and move the knife
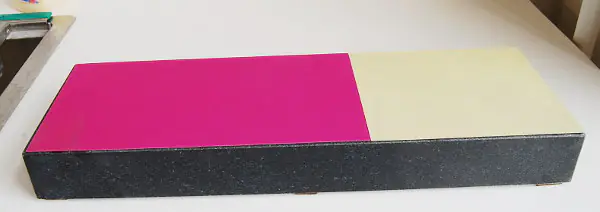
A sheet of Alox Finishing Film with a grain size of 100 μ (approx. P 150) was chosen for the initial shaping and a sheet with 40 μ (approx. P 400) for sanding out the grooves caused by the coarser sheet. The sheets are sized 230 x 280 mm, which corresponds to the size of standard sanding sheets. Since no suitable glass plate was available, I decided to use a granite measuring plate measuring 457 x 152 x 51 mm, which allowed both sanding sheets to be adhered to the surface simultaneously. As the surface of the granite plate is slightly smaller than the area of two sanding sheets, I cut the coarse one to 150 x 280 mm and the fine one to 150 x 170 mm and adhered both to the plate. The Alox Finishing sheets have a self-adhesive backing. It is essential to ensure that the flat base is completely level and grease-free.
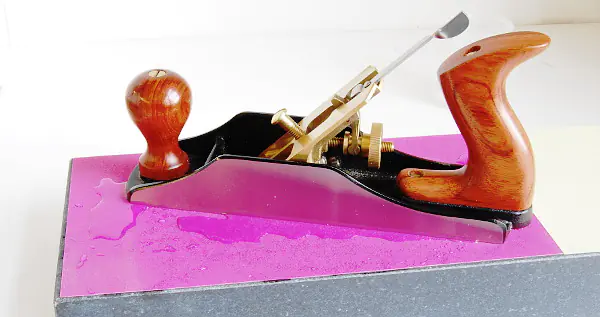
Now a few drops of water fell on the finishing film and it was time to start. I moved the planer in circular motions over the magenta sanding surface with a grain size of 100 μ.
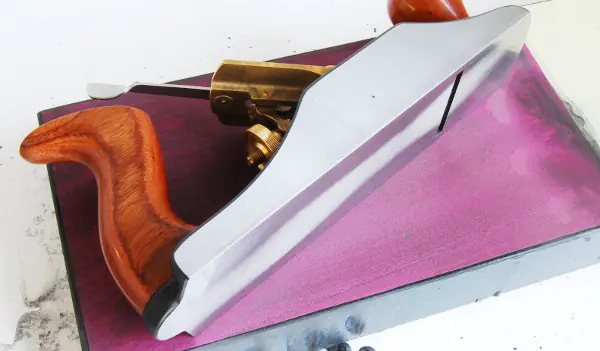
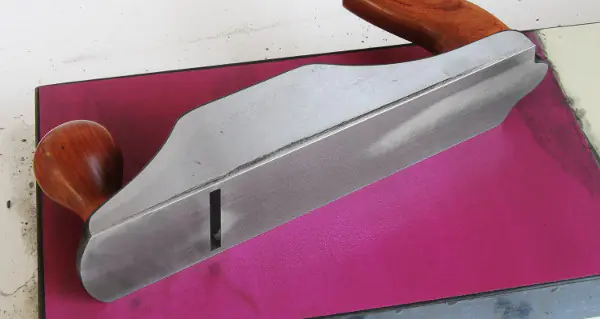
After about 15 minutes, the sole of the plane looked like this. The dark stripes on the side of the sole indicate where the abrasive has made contact and where it has not. There was still quite a bit to do, especially in the area of the mouth of the plane, where the abrasive needs to make contact across the entire width. It is worth mentioning that the progress is becoming increasingly slower. This has two causes. On the one hand, the area covered by the abrasive is getting larger, and on the other hand, the grain is slowly becoming duller. So it's time to change the blade now.
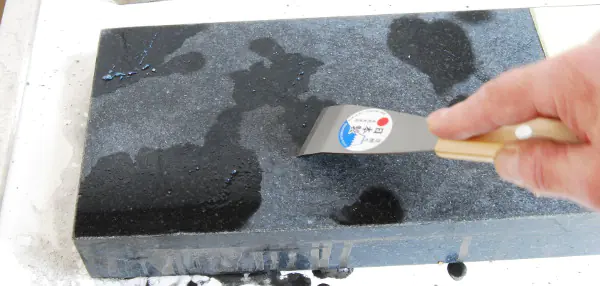
The used blade was easily removed, smaller residues of the adhesive were removed with a spatula and alcohol.
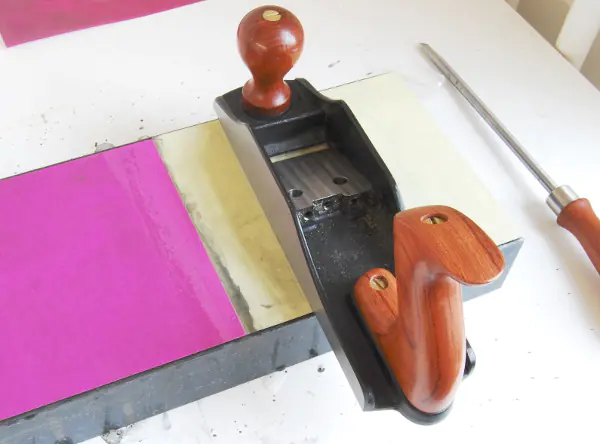
After laying a new blade, we continued. As you can see, I have meanwhile removed the frog (also the steel screws) to prevent water from penetrating between the frog and the bed due to capillary action and causing rust to form. The light spots around the middle of the mouth and the larger light stripe in the middle back show where the abrasive has not yet taken effect. What appears as light spots at the front of the sole is just unfavorable light incidence; the abrasive worked very well there. The black stripe at the edge is grinding sludge. You can see: we have already come quite a long way, but we are still not finished. At this stage, it also went noticeably slower again and requires a bit of perseverance. I decided to change the blade again.
After the deepest point around the plane mouth was also reached by the abrasive, I switched from the circular sanding motion - still on the magenta coarse sheet - to a back-and-forth motion to achieve an even groove structure. Then, the plane was moved slightly further to the right and was sanded with the same movements - back and forth - on the fine sandpaper with a grain size of 40 μ (approx. P 400).