Ron Hock's Sharpening Notes
Translated from English to German by Dieter Schmid.
Although many woodworkers perceive sharpening as a kind of enjoyable meditation for inner preparation before work, most want to get this matter off the table quickly to start the actual work. There is much more to say about sharpening than can be covered in these few pages. Therefore, I refer you to many good books on this topic. What I offer you here - in brief form - are some ideas and methods that will make the task easier for you.
First: the goal: A sharp edge exists only where two planes (e.g., the mirror side and the bevel of a plane iron or chisel) meet with zero radius. Of course, the zero radius is a theoretical ideal that we can never achieve but should strive for.
First: the goal

The next, the way to the sharp edge:
A sharp edge exists only where two planes (e.g. the mirror side and the bevel of a plane iron or chisel) meet with zero radius. Of course, the zero radius is a theoretical ideal that we can never achieve but should strive for.
There will always be a radius at an edge, but it is our task to make this radius as small as possible. (The fine-grained steel makes this task easier; the hardened particles in our steel are very small and thus allow for a smaller radius, i.e. a sharper edge.)
Sharpening aids are useful things.
All common abrasives make your edge sharp. What you choose is up to you. The venerable ARKANSAS oil stone is legendary and maintains its shape and flatness with little effort. The ARKANSAS is a natural product from the quarry and lasts a lifetime. Artificial water stones - increasingly introduced from Japan in recent times - have a great tradition there as natural stones. These stones sharpen faster because they are softer. The dull particles are quickly washed away, and new fresh and sharp particles come to the surface. However, this very softness requires frequent dressing. If the stone is hollow-ground, reasonable sharpening and dressing is not possible.
Many woodworkers use various sheets of wet sandpaper as their abrasive. A glass plate serves as a flat surface. To move to the next finer stage of sharpening, finer sheets are simply placed one after the other. The low entry costs, the simple application, and a variety of grits up to 2000 or higher make this method a good choice for beginners. Then there are diamond stones (very good for coarse sharpening), metal plates (those who know them swear by them), ceramic stones, leather strips (excellent for fine honing), and countless grinding machines. All of this is to simplify the task of sharpening!
If you have a method you like, that works for you, stick with it and stay with it. The following steps are general and can be followed regardless of your preferred sharpening method. If you are new here and do not have sandpaper, go to the nearest auto parts store and buy 2 pieces of sandpaper in the following grits: 180, 320, 400, 600, 1200, 2000. Some also use adhesive spray to stick the sandpaper down. From the glazier, you then get a disc about 6 mm thick, around 30 x 30 cm. A slab of marble or granite will also do. Look for a suitable place on your workbench for this. With a new blade, start with the 600 grit paper. If a lot needs to be smoothed on the mirror side, do not hesitate to use coarser paper to save time. Especially if your blade has nicks or is very dull, start with 320 or even 180 grit.
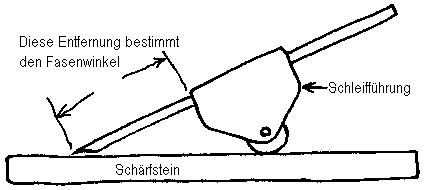
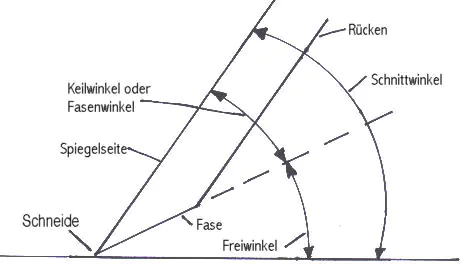
Experiment with different angles
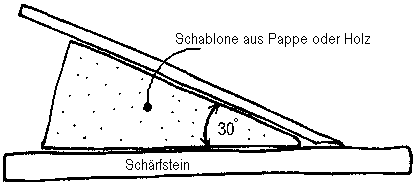
Do you not have a sanding guide?
Start by sharpening the bevel
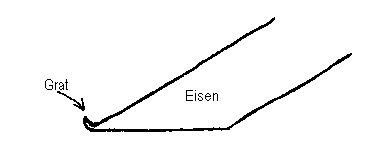
Now turn the chisel,
Switch to a finer grit now
to work on the back side. Flattening the back side, i.e., making it truly flat, is just as important as sharpening the bevel. I repeat: Flattening the back side is just as important as sharpening the bevel. If you think about it, it will become clear to you: In a plane with the bevel down, as in all bench planes, the back side determines the quality of the edge. The back side must be flat to ensure that the edge is straight, smooth, and sharp - without waves, valleys, or teeth marks. Some woodworkers believe that the entire back side, from the edge to the screw slot for the chip breaker (blade), should be absolutely flat and smooth. Others think that a few millimeters in the area of the edge are sufficient since the chip breaker covers the rest of the back side anyway. It's up to you what you follow!
If possible, keep the sharpening guide on the iron during this process; do this and simply let it hang over the edge of the sharpening stone while you work on the back side. You save a lot of work if you don't have to re-clamp the iron in the sharpening guide and adjust the angle every time you switch to a finer grit. For the back side, use the same stone that you used before for the bevel. Move the iron with pressure in calm, firm, and uniform strokes over the stone, ensuring that it always remains flat on the surface of the sharpening stone. Do this until the entire area intended for sharpening is covered with uniform scratches from the current sharpening process. It is quite common for plane irons to be slightly hollow on the back side, and flattening reveals a curve of fresh metal at the edge and at the corners. You can enlarge this area as needed until the entire back side is evenly covered with the coarse scratches. Once you have thoroughly worked on the back side and the flat surface of the back side meets the flat surface of the bevel (zero radius!), a burr will appear on the bevel side. Now you have completed the first stage.
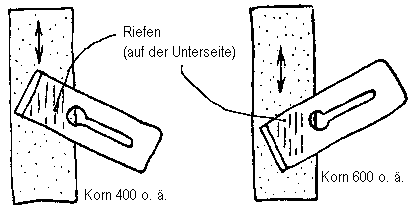
Constantly observe the iron to ensure it remains at a right angle!
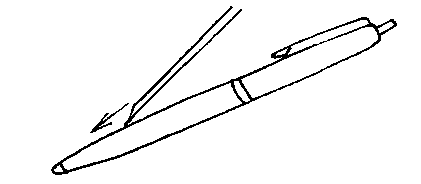
To test the sharpness:
If you come at the bevel from the right angle, simply press a little harder on the higher side to approach it again. Proceed this way through all the grits you have available. The ground or honed surfaces increasingly look like mirrors, a sure sign of increasing sharpness.
For most applications, grit 2000 is sufficient. However, for a perfect finish, you should use a 6000 water stone or a strop for razors with the appropriate sharpening paste beyond the 2000 grit paper. The 6000 water stone is a soft stone with high grinding effect - however, it can be tricky at times because the iron tends to stick to the fine surface. Slow strokes, plenty of water, and patience are required. A strop can be made of leather, cardboard, or wood; its fine surface structure produces the finest removal. It is best to lightly pull the edge over the strop to avoid cutting into it. Whether stone or strop: make sure to press the mirror side of the iron flat and only work the bevel at the now specified correct angle. Otherwise, you will get a rounded edge that you certainly do not want!
