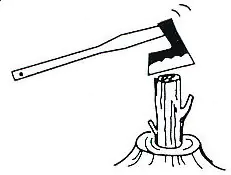
Instructions for Fitting Axes and Hatchets
Few dare to fit an axe themselves. However, if you already have some craftsmanship experience and pay attention to the following tips, you will succeed.
When purchasing, pay attention to the quality of the handle. The handle should be made from seasoned or properly kiln-dried wood. The wood fibers should be as straight and continuous as possible. With short, i.e., slanted fibers, a break is preprogrammed. Suitable types of wood are ash and hickory; in Japanese axes, white oak is usually used. If you want to make a handle yourself, which is not that difficult with a drawknife: only use dry and sufficiently seasoned wood.
The wood of the axe handle should be as dry as possible, ideally drier than during later storage or use. Therefore, the newly purchased axe handle should ideally lie in dry air for at least a week, e.g., in a centrally heated room. Feel free to place it on the radiator! If the humidity increases in the fitted state, the handle will sit even tighter. If the humidity drops below the level at the time of fitting, the handle will become loose!
Axe handles (axe shafts) are manufactured mechanically, so one can assume that the shape is the same for every handle of a type. In contrast, with hand-forged axe heads, the eye (the hole in the head of the axe into which the handle is inserted) is slightly different for each axe. This means that the shape of the axe handle usually still needs to be adjusted a bit. When pressing it into the eye, it should be filled as completely as possible with wood, although excessive precision is not necessary.
The picture shows a Japanese axe provisionally fitted! Wedge and handle must be removed for final fitting.

Uneven Tenons:
These occur due to unstable holding of the machine. Make sure not to shake the machine back and forth, but try to maintain the direction. Reducing the speed helps with this.
Too Small Tenons:
The cutter is pushed too far forward. Move it back slightly and try again.
Tenons that look like they have threads: Too much pressure is being applied. Additionally, a brass plate should be used to reduce the chip thickness.
This damage can also occur when retracting the tool after completing the tenon. This happens most often with green wood, as it compresses easily when cutting the tenon. Pull the tenon cutter back with the machine stationary or with a slight counterclockwise rotation.
Off-Center Tenons:
If the fiber structure of the wood is accordingly, there is nothing you can do about it.
If the wood has a uniform fiber structure and you hold the drill horizontally and aligned, the cause may be that the raw material is too thick in relation to the tenon diameter to be achieved. This off-centering occurs already when setting and cutting the rounded shoulder. The thicker the raw material, the more difficult it is to get a good guide from the start. You can make the raw material a bit thinner or bevel the four edges. Sometimes increased pressure at the beginning helps, but it must be reduced again as soon as the rounded shoulder has formed.
Half Tenons:
If the tenon cutter suddenly stops cutting in the middle, the blade must be pushed forward slightly.
If this blade adjustment does not help, an off-center tenon may be the cause. This can happen with large pieces of wood if the rounded shoulder has already been cut off-center. Cut the oversized pieces narrower before using the tenon cutter.
Uneven Cutting Edge When Sharpening:
This usually happens when the drill press table is not at a right angle to the drill axis. The table needs to be adjusted.
Another reason is slightly different diameters of the grinding cylinders. The bevel changes slightly, but this does not affect the work result.
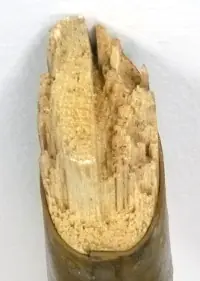
To remove the old handle or its remnants, simply saw it off. The rest is drilled out as often as necessary until it can be knocked out with a hammer and a blunt chisel.
If you want to re-handle an old axe, the handle diameter should always be chosen slightly larger in case of doubt. This is important because old axe heads and new handles rarely fit together. Most of the time, the ratio of width to length of the oval, round, or triangular shaft does not match.
There are various methods to shape the handle to fit the eye (ear). The simplest and most effective is the use of a rasp. If you prefer a draw knife or even a draw blade: that's fine too! Hold the front end of the handle against the ear and trace the contours with a pencil from the other side. Then remove enough material so that the handle can be pressed slightly by hand into the ear. Marking helps a little, but mainly, it requires a good eye.
Safety instructions for use

Check before each use that the head is securely attached to the handle. A loose axe head is dangerous! If not used for a long time, oil the axe head to prevent rust.
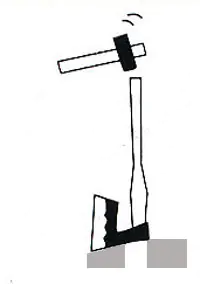
Under no circumstances strike the back of the axe with a hammer. The eye will be bent! Do not use the axe itself as a hammer!