Construction of a Japanese plane
Planes appeared in Japan much later than in Europe, around the year 1500. Until then, surfaces were smoothed with a so-called lance plane, the yari ganna. The lance plane, with a short slightly curved blade at the end of a long handle, is pulled over the wood with both hands. It leaves a smooth but slightly ribbed surface. The models for a plane with a fixed iron and straight edge are believed to have originated from China and Korea. With them, it became possible to truly work surfaces flat. Planes in Japan have only been equipped with chip breakers since the end of the 19th century, likely inspired by Western tools.
In its reduced cubic form, the traditional hand plane represents many examples of Japanese design. Despite its primitiveness, it surprises with high performance. It consists of only two, at most four parts: the low plane body and a thick, slightly conically shaped plane iron, and possibly a chip breaker and a support. There is neither a strike button nor a hand guard; the Japanese plane operates without "horns" and does not have fine adjustment via screws. Its handling, especially the adjustment with a hammer, usually requires longer habituation and practice; the best results are achieved with it on softwoods. Thanks to its low height and center of gravity, it sits firmly and does not wobble. You work with the Japanese plane much closer to the wood than with its Western relatives.
Wood Selection
In Japan, the wood of the Kashi tree, an evergreen broadleaf tree, is traditionally used for making planes. Due to its high hardness, the plane sole hardly wears out. Thanks to its high toughness and split resistance, the plane body hardly tears. Finally, the relatively light color of the wood makes sense, as the dark plane iron is always easy to see due to the contrast. Therefore, use a blank made of Kashi or take a particularly well-seasoned local wood with similar properties, such as stress-free red beech, white beech, or fine-grained maple wood.
Particular care is required in selecting the material. It should be as straight-grained and stress-free wood as possible, dried for at least one to two years. The "left" side, that is, the side facing away from the heart, forms the plane sole, while the "right" side faces up. If the material is dried again, the sole will become slightly hollow. The wood fibers either run parallel to the plane sole or are slightly inclined towards the iron. Such an inclination allows the plane to glide better and its sole wears less. The two ends of the plane body, called dai, are referred to as "atama" or head and "shiri" or butt.
Note: The work steps were documented in the Inomoto workshop in Sanjo, which specializes in the production of smoothing planes. The templates for the sketches of the individual work steps also come from Mr. Inomoto.
Marking
Hold the chisel with your right hand. Press several fingers of your left hand (depending on the width of the chisel) against the flat side of the chisel at the bottom of the bevel, so that its surface rests stable on the sharpening stone. You can support the chisel from below with your thumb. The best edge is achieved when the edge is held perpendicular or at an angle of up to 30° to the direction of sharpening.
In contrast, for narrow chisels, where the edge is narrower than the length of the bevel: Hold these chisels with your right hand as far back on the handle as possible and move them back and forth while sharpening with the edge. It is perfectly legitimate to use a sharpening guide, which is strongly recommended for beginners. Sharpen until a fine burr forms on the edge.
Now - but not before - you can proceed to honing the edge. Use a sharpening stone with a grit between 3000 and 8000 and work on the bevel and flat side alternately just like in the previous sharpening process. The burr will fall off, and the bevel and flat side will become increasingly shiny and thus sharper as the honing process progresses.
Make sure to carefully dry the chisel after sharpening and lightly oil it before storage to avoid corrosion. Then you will enjoy your precious tool for a long time.

Working out
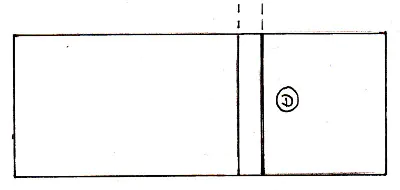
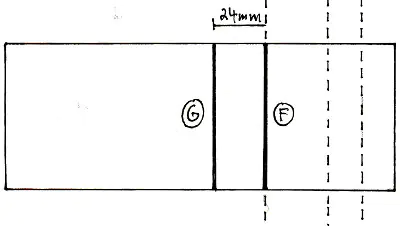
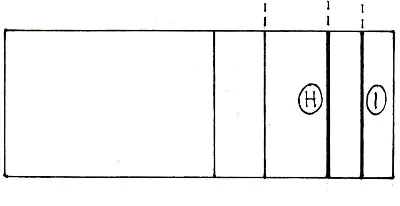
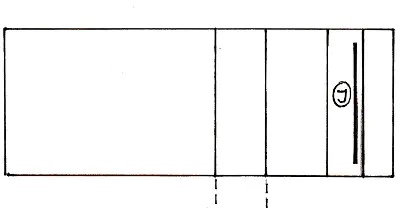
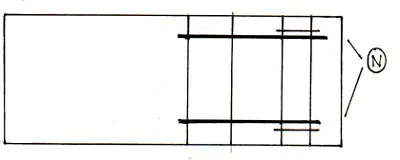
Finally, the width of the plane iron and the chip box is also scribed on the sole of the plane body. For this, mark the scribe lines L and M.

Tuning
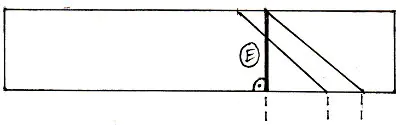
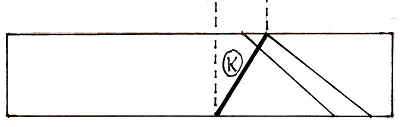
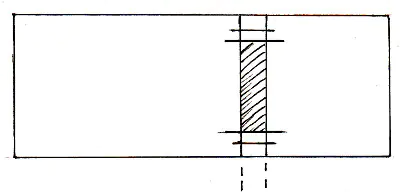
Mark the position of the abutment pin on one cheek of the plane body. This pin will be recessed at two-thirds the height of the plane body. When marking the position, the chip breaker should be set back about 6 mm from the sole; otherwise, the chip breaker will not fit snugly later on.